Monthly Archives: May 2013

Mexican-Style Rice, Beans and Spiced Steak

Last night for dinner I whipped up a series of quick and easy Mexican favorites for dinner. I’m making a concerted effort to use up the abundance of food in my freezer, instead of buying more, so two flank steaks came out of the freezer and were defrosted to contribute to my little fiesta. The result – steak and bean burritos!

20130531-092149.jpg

The burritos are actually made up of several easy recipes. Each of these recipes is a favorite of mine – and they can be used individually or combined to make lots of Tex-Mex favorites! Up first…

20130531-092221.jpg

Quick & Easy Mexican-Style Rice
Serves four.

    – 1 cup uncooked rice (I used brown rice)
    – 1 ¾ cups chicken stock (or water, or a combination of both)
    – ½ cup salsa

Combine the rice, chicken stock and salsa in a pot. Cover and bring to a boil. Cook for 45 minutes or until rice is tender and liquid absorbed. You can add more liquid to the rice if it looks dry during cooking. Because I use brown rice, it takes 45 minutes which isn’t exactly a “quick” recipe per say, but is it quicker than chopping up all the veggies! If you want to make the switch to white rice, it will reduce the cooking time to 20 minutes.

Quick & Easy Spiced Black Beans

20130531-092250.jpg

Serves two to three.

Rinse and drain the black beans (did you know that rinsing canned beans can reduce the sodium levels by up to 40%?!). Combine beans and seasoning in a microwave-safe dish with a tablespoon of water. Microwave on high for 1 to 1 ½ minutes, until heated through. Mix to thoroughly combine.

20130531-092319.jpg

Fajita-Spiced Steak
Serves two to four (depending on serving size).

    – Two medium steaks (flank steak and flat iron are great for this purpose)
    – 3 tablespoons homemade taco seasoning
    – 1 tablespoon garlic powder
    – 1 tablespoon onion powder
    – Salt and pepper, to taste

Let the steaks come to room temperature, and coat in the seasonings (including salt and pepper). Grill to desired doneness. Let the steaks rest, and then slice against the grain.

Serving suggestions:
– Wrapped in tortillas with peppers and onion for fajitas.
– In tortillas with rice and beans (recipes above) for burritos.
– Pressed with cheese in tortillas for steak quesadillas (see my quesadilla recipe).
– Sliced on top of a salad with salsa.
– Make your own “burrito bowl” with rice, beans, and your other favorite toppings.

These recipes can be mixed and matched to make a ton of different Tex-Mex style dinners. And best of all, these recipes are easy to throw together with ingredients you probably already have on hand – no trip to the store necessary! 🙂

Turkey Hummus Wrap

The other day, I discovered a delicious way to incorporate some protein into my typical salad lunch – a protein-filled wrap! It was a nice change-up from incorporating protein by adding beans to my salad or making my Caesar-style Dressing.

20130530-092317.jpg

Turkey and Hummus Wrap
Serves one

    – 1 whole wheat wrap (I used Ezekiel brand)
    – 3 tablespoons hummus (I used Sabre’s Roasted Garlic flavor – but you could make your own!)
    – 3 slices roasted turkey
    – 2 slices Colby-jack cheese

Spread the hummus evenly on the wrap. Layer on turkey and cheese and roll up into a tube.

Delicious! And such an easy (and portable) lunch! I’m planning on making one of these to take to a concert with me on Saturday instead of eating the greasy, fatty options at the venue. You could add lettuce, tomato, etc to the wrap – I didn’t because I was having a salad on the side, and because I wanted the wrap to roll up nice and tight.

What is your favorite quick and easy healthy lunch?

Living Life With a Kind Spirit

Happy Friday everyone! I hope everyone has a relaxing, happy, and healthful Memorial Day weekend planned! Personally, I’m thankful to have a long weekend off of work (I’m taking through Tuesday off) and to be able to spend that time with my wonderful family. I hope everyone else is getting the same opportunity.

An important part of a healthy life is a positive attitude. For a long time, I was a rather negative and angry person – and I’ve been making a conscious effort to change that about myself. I’m not perfect of course, but I think I’m doing better at looking at others with a kind perspective, rather than from a place of judgment. It’s a hard change to make – and definitely one that takes a dedicated effort (at least for me) as I find my natural reaction is not to act with kindness. To start this long weekend off on the right foot, I wanted to share a few different tools with you all that help me to see the world in a different light.

First, a story my Mom shared with my through email from a series called ‘Kerrying On’ by Kerry Patterson. She emailed the story to me, but I didn’t want to copy and paste it here as Mr. Patterson has a blog and the story is in full at this link. I know I appreciate readers coming to my page so I wouldn’t want to take any away from him! (although he has LOTS more readers than me!) The story basically talks about a childhood experience that helped him see others in a kind light – the way you would view a beloved family member. It’s a short read, and it’s totally worth it so please check it out if you have the time. I read it years ago, and I’ve often thought of it since then when tough situations present themselves.

Second, the other day on Facebook I clicked on this video shared by a friend. I was expecting it to be something funny or silly – but it was a really meaningful look at how we view other people. Basically, the conscious choice we make on how to react to situations. It is a long(ish) video, but I promise you it’s worth it. It’s from a Commencement speech delivered by David Foster Wallace.

Finally, a couple of inspirational graphics. You know how much I love these things. And here’s a few more.

20130524-101720.jpg

20130524-101743.jpg

Have a peaceful and healthful weekend! 🙂

Chili – Cincinnati Style

This weekend I decided to make chili in the Crock Pot. It’s completely out of season since people tend to eat soups and chilis in the winter, and summer has just started to kick in for the DC area, but I’ve never been very good at doing things at appropriate seasonal times. I tend to cut my hair short in the winter, as I did this past winter – to a pixie cut. And dye my hair darker in the spring. I just can’t get myself on the right seasonal clock. Maybe I’m meant to live in the southern hemisphere. 🙂

My absolute favorite kind of chili is Cincinnati-style. Part of my family is from Ohio, so I was fortunate enough to get to try this style of chili growing up. It has a very unique “sweet-spiciness” to it which is the result of cinnamon in the recipe. Also, in Ohio they traditionally serve it on top of spaghetti. Personally, I’m not one for chili on my spaghetti but I do think this style of chili is the perfect texture and taste for chili dogs. Hello guilty pleasure!

I decided to cook this chili in the slow cooker, as I do with most chili recipes, because chili is one of those foods that only gets better the longer the ingredients have to meld together. Plus, you can’t get easier than the slow cooker! Since it was a warm and sunny day outside, I could start my chili and then leave it while I enjoyed the beautiful weather at the Washington National’s game with my friend Jen. And I returned to a pot of delicious chili! I’ve been fooling around with a few chili recipes for a while, but I think this one is finally perfect! 🙂

20130523-090834.jpg

Cincinnati-style Chili in the Crock Pot
Serves 8

    – 2 pounds ground beef (preferably grass-fed)
    – 6 oz of tomato paste
    – 1 onion, chopped
    – 4 cloves garlic, chopped
    – 2 tablespoons chili powder
    – 1 teaspoon unsweetened dark chocolate cocoa powder
    – 1 teaspoon cinnamon
    – 2 teaspoons dried marjoram (can substitute oregano – but it’s a stronger flavor)
    – ½ teaspoon cayenne pepper
    – Pinch of ground cloves
    – 2 15 oz cans of dark red kidney beans

Brown the ground beef in a skillet and drain well. Add the beef and all other ingredients except the beans to the slow cooker and cook on low for 8 hours. You don’t have to worry about chopping the onions or garlic too small, as both will “cook away” and become part of the sauce/beef mixture. You can hardly tell there are any onions in the chili! It could be a good way to sneak in some vegetables if you have picky eaters in the house. Add the beans to the slow cooker during the last hour of cooking. Serve Ohio-style over spaghetti with sharp cheddar cheese, or over hot dogs, or just plain in a bowl with some shredded cheddar on top. It’s delicious in so many different ways! 🙂

Note: I’m a big fan of beans so this recipe is a little bean-heavy. You can reduce the recipe to 1 can of beans if you prefer.

Green Cleaner: Bathroom Cleaner

One of my all-time least favorite chores is cleaning the bathroom. I’m sort of a neat-freak, so it still gets done, but I definitely avoid it for as long as possible. In contrast, I’m a big fan of doing dishes. I don’t know what it is – but I find the process calming. And it’s the solution to one of my biggest pet peeves – dishes in the sink. 🙂

So last weekend I knew I needed to get around to cleaning my bathroom. I won’t say how long it had been, but it had been too long. Living alone allows you to procrastinate like that. I had officially used up the last of my conventional shower cleaner – which meant it was time to find a green cleaning solution for cleaning the shower. And I sure picked the perfect shower to test it on considering how dirty it was! I should have taken a before picture, but I didn’t have a ton of faith that green cleaning was going to work as well as it did. Boy was I impressed!

After scanning through Pinterest and Google, I found that most sources agreed on using a mixture of 50% warm vinegar and 50% blue dawn dish soap (they are all very adamant about the ‘blue’ part, oddly enough) to clean the shower. It can’t be that easy, can it?

Well let me tell you, it is.

I microwaved a cup of vinegar until it was just warm (about a minute) and then added it to my spray bottle along with a cup of dawn dish soap. Dawn dish soap really is a miracle worker as it’s also an ingredient in my homemade spot remover and the first recipe for my homemade laundry detergent. I shook the spray bottle to combine and then sprayed it all over the shower (walls/faucet, shelves, everything) and the sink, for good measure. I let the mixture sit for two hours (while I ran out to do some errands), and came home and wiped everything down with a combination of a scrub brush and a sponge. It did require a little scrubbing in some of the dirtier areas, but I don’t mind that. And considering how dirty the shower was – the mixture really cut through the scum like magic! This will definitely be my go-to shower cleaner from now on!

20130522-091320.jpg

The mixture can’t be made ahead of time since I think the vinegar being warm is a key component, but I also don’t think it’s overly time consuming to mix up a batch right before you need to clean. The 2 cup portion (1 cup of each ingredient) I made was completely used up cleaning my shower and sink, so none of it went to waste.

I’ve heard a few people say that they don’t like completely switching to green cleaning products because using them doesn’t make the house “smell clean.” Unfortunately, that “clean smell” from most conventional cleaning products is usually bleach and/or other harsh chemicals. That smell isn’t necessary to know that something is clean! And I don’t know if those people haven’t smelled hot vinegar but – whoa, does that smell clean to me! 🙂

What is your least favorite chore?
Do you have any surprisingly favorite chores?

‘Everything’ Cookies Recipe

On Sunday night I was seized by the urge to bake a version of these Oatmeal Raisin Cookies from Bon Appétit Magazine. I wasn’t craving cookies, actually I didn’t have any intention of eating the cookies – I just really wanted to cook something new. And this cookie recipe had been haunting me for a few days.

And thus we’ve arrived at the crux of the problem. The reason I have way too much food in my house for a single girl. (Seriously, in case of apocalypse, everyone should assemble at my house and I can keep us alive) And the reason I should really change my career to something food-related. So that I don’t bake two dozen cookies on a Sunday evening for no reason at all.

Luckily, I found a solution that allowed me to bake cookies, and keep myself from having two dozen cookies around the house in need of a home. But we’ll get to that in a minute.

First off, I pulled up a copy of the recipe. Why is it cookie recipes always make so many damn cookies? The original recipe says it makes 4 dozen. I can’t think of many circumstances when I would need 4 dozen cookies – that’s just excessive. So I cut the recipe in half. Which of course means the entire time I’m cooking I have to re-calculate the recipe and constantly remind myself not to put in the original amounts. Unfortunately, I’m usually singing and dancing around my kitchen in a very distracted manner and forget and end up putting in twice as much butter as necessary or something to that effect. But this time I think I came through un-scathed. Who knows? I guess there’s a possibility that I accidently doubled the baking powder at some point but the cookies turned out okay, so I’m not going to question them.

The original recipe called for just raisins, but I didn’t have any raisins. Plus I find it fundamentally odd when people over the age of 4 eat raisins. It may be just me, but when I picture raisins I picture those tiny snack boxes that adult fingers don’t fit in to. Plus, eating an oatmeal raisin cookie that looked like it was a chocolate chip cookie is, frankly, why I have trust issues. Which I always have on hand. So I ended up switching out the raisins for cranberries, adding walnuts (because I love cranberries and walnuts together), and dark chocolate chips because…well let’s be serious, you don’t need a reason to add dark chocolate chips. Therefore, I’m going to re-christen these cookies “Everything Cookies.” Because there’s a whole lot of everything packed into these cookies and it sounds so much better than “Oatmeal Cranberry Walnut Dark Chocolate (Whole Wheat) Cookies.” Phew, that’s a mouthful! And not as tasty as a mouthful of cookie!

’Everything’ Cookies
Makes two dozen cookies

    – 1 cup whole wheat flour
    – ¼ teaspoon baking powder
    – ¼ teaspoon baking soda
    – ¼ teaspoon kosher salt
    – Pinch ground nutmeg
    – ½ teaspoon cinnamon
    – ½ cup (1 stick) unsalted butter, softened to room temperature
    – ½ cup light brown sugar
    – ¼ cup sugar
    – 2 large eggs
    – ½ teaspoon vanilla
    – 1 cup old fashioned oats
    – ¾ cup dried fruit (I went with cranberries)
    – ¼ cup chopped walnuts
    – ¼ cup dark chocolate chips

Bake at 350 degrees for 15-18 minutes.

Mix the first six (dry) ingredients in a large bowl. Set aside. Cream the softened butter together with the brown and white sugars. This process is much easier using a mixer of some kind, but I obsessively do it by hand. I figure if I’m going to make full-on sugary, fatty cookies – I’m going to work for it. Once the butter and sugar are thoroughly combined (which is a time-consuming process), add eggs and vanilla. Then add the wet mixture to the dry mixture and combine. For me, this part was a little dry so I added a few splashes of milk and it came together after that. Fold in the oats, fruit, etc. It will look like this.

20130521-101554.jpg

So here’s where my idea comes in. The original Bon Appétit article was to roll the cookie dough up into a log and then freeze it, so you have a log of frozen cookie dough ready to use when you need it. It also suggests that you can just slice off the cookies you need and bake them up, thus helping with portion control. While I like this idea, I don’t like the idea of having to slice portions off of a frozen log of cookie dough. That doesn’t sound like it would be as easy as they’re making it out to be. Sure, I’ll just saw through this log of dough and end up with perfect little round cookies and no injuries? Highly unlikely.

So I decided to roll the dough into balls and freeze on a cookie sheet, then store in a ziplock bag. Here are the cookies all rolled up and ready for the freezer.

20130521-101704.jpg

And, after freezing for 2 and a half hours, happily hanging out in their storage bag.

20130521-101454.jpg

Now, when I want a cookie I can just pop a cookie dough ball or two into the oven and enjoy a fresh baked cookie! That’s an idea I can get behind.

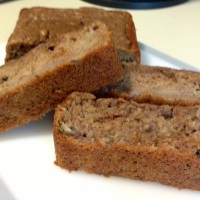
I know what you’re thinking, you didn’t read through this whole recipe not to have some cookies get baked! I figured I’d cook up two as testers so I popped them into the oven at 350 degrees for about 15 minutes. Here they are:

20130521-101338.jpg

They were delicious! They have a very trail-mix like texture to them. And they were warm and chewy. For future reference for baking the frozen balls, I would bake them at the same temperature but they might need a minute or two longer to account for the lower starting temperature of the dough. I’ll update this post once I bake one from frozen if there is a huge difference! 🙂

Update: I baked two cookies up from frozen last night at 350 degrees for 15 minutes and it worked beautifully! 🙂 it didn’t look like it was going so well for the first 5 minutes or so but after that they evened up and turned out even better than the first batch! 🙂

Creamy Caesar-Style Dressing

After my Body Pump class on Saturday, I was looking for a quick lunch to pull together that would have plenty of protein and other nutrients to re-fuel my body. I also had a ton of lettuce in my fridge that needed to be used before it went bad (continuing my never ending saga of finding a way to “use up” things in my house before they go bad). I knew a salad would be a quick and easy lunch, but not one that was particularly protein-rich, unless I made a few additions to it. So I gathered up my usual salad ingredients – some lettuce and cucumbers and I topped it off with some canned white beans and some leftover chicken I had in the fridge. I was just about to top it off with my standard vinaigrette when I had an epiphany. If I made a creamy-style salad dressing using Greek yogurt as the base, that would up the protein content even more! Fun fact: Greek yogurt (depending on the brand) has approximately 23 grams of protein in one cup of yogurt. I use the Stonyfield Organic, Nonfat variety. And thus, this recipe for a Creamy Caesar-Style Dressing was born! I was more than a little stoked that it came out so delicious, since Caesar salad is one of my absolute favorite foods.

20130520-112013.jpg

Creamy Caesar-Style Salad Dressing
Serves four

    – 1 cup nonfat Greek yogurt
    – 2 tablespoons lemon juice
    – ¼ cup Dijon mustard
    – 3 tablespoons Parmesan cheese, grated
    – 2 small cloves garlic, minced or pasted (alternatively, use about 1 tablespoon granulated garlic, to your taste)
    – Salt and freshly cracked black pepper, to taste
    – 3-4 tablespoons olive oil, or until the dressing becomes the right consistency

I’m usually pretty ‘stuck in a rut’ when it comes to my salads and almost always make some version of a balsamic vinaigrette, but this is definitely a keeper that I’m going to be using very often! Who knew that you could make a healthy, creamy Caesar dressing? Yum!

Friday Blog Party! May 17

Happy Friday everyone! This week has been a rough one. Nothing seemed to be going my way – my runs didn’t go well, work was particularly tedious, and my energy just seemed to be gone. But there’s nothing like Friday to make that all better! And a Friday Blog Party!

happy-friday1

I decided I wanted to share an idea from my friend Valerie at Atlanta Mom of Three. Every Friday, she hosts a Blog Party. It’s a link-sharing opportunity for all the bloggers out there. I don’t think I’ll do every Friday – but I wanted to give it a shot! 🙂

To join the party, all you have to do is choose one of your blog posts from this week (or just a recent post), and introduce it in the comments and link to it. It can be your favorite post, or the one that got the most response, or the one you wish had gotten more of a response, or the one you’re the most proud of. It’s up to you! 🙂

I’m hoping this will be an opportunity for me to catch up on the blog posts I may have missed, and for everyone to get a chance to share their posts with other bloggers. So let’s get linkin’! 🙂

I also wanted to share that I created an official Facebook page for Foxy Whole Foodie (link in the sidebar) so please feel free to follow me there as well! I thought Facebook would be a better venue for sharing health and fitness related news articles, tips, and motivation posts!

New Homemade Laundry Detergent

This weekend I decided to try a new laundry detergent recipe. I like my current homemade laundry detergent just fine, but using that process I store two gallon jugs of laundry detergent (water already added) and use about 1 cup per load, so I feel like I go through it so fast. Plus I just can’t wrap my mind around the concept of storing detergent with so much water in it. There’s water in the washing machine! It just seems like a waste of time and space.

The main thing that has deterred me from so many homemade laundry detergent recipes is the need to grate and boil soap. The idea of grating a bar of soap on my box grater seems 1) like it would damage my box grater (it didn’t) and 2) like it would make a gigantic mess (turns out it’s only a moderate mess). But I decided to go for it after reading several blogs that swore it wouldn’t damage my grater. It is just soap after all; I don’t know what my paranoia was all about.

Step 1) the dreaded process of grating the soap. My game plan: place my box grater on top of a large paper plate and grate the Fels-Naptha soap using the larger grating holes and (hopefully) the plate will catch all the bits and then the plate would serve the dual purpose of allowing me to funnel the pieces into my storage jar. Quick shout out to my mom for donating the jar for me to use. She has no shortage of empty glass jars around the house (seriously – where do they come from?) and I have no shortage of uses for empty jars. It’s quite a symbiotic relationship.

Grating the soap was a success! I was also secretly scared that my weak little noodle arms wouldn’t be conducive to soap-grating but the soap turned out to be the texture of semi-hard cheese, like cheddar, and was a breeze to grate. There was a good bit of soap that did not obediently land on the paper plate, but instead was all over my coffee table, but I just scraped it off the side of the table and onto the plate with its brethren. Problem solved!

Next, I added the soap to a large mason jar along with 1 cup of borax and 1 cup of washing soda (both ingredients in my old recipe), closed up the jar and shook to combine. The ingredients do have a tendency to separate when the jar sits for a while, but just shake it up before using and you’re ready to go! 🙂 I of course had to do a load of laundry right then to try it out and it worked great – and smelled wonderful! The Fels-Naptha soap has a real “old-timey” clean smell going on. Perfect for someone like me who doesn’t like artificial scents. Note: I still use my homemade spot remover on any visible stains before throwing items in the wash.

20130515-110247.jpg

Here’s the easy-to-read recipe:

    – 1 bar Fels-Naptha soap, grated
    – 1 cup borax
    – 1 cup washing soda

Mix all ingredients together in an airtight container and store. Shake well before using. Use 1 tablespoon per load.

Using one tablespoon per load means you can do approximately 36 loads of laundry with this one jar! And the ingredients are super cheap and will make you many more jars in the future. Also, the washing soda and borax are both ingredients in my homemade dishwasher detergent so they do double-duty. 🙂

The Versatile Blogger Award

20130515-093634.jpg

Well first and foremost I have to thank Valerie at Atlanta Mom of Three for nominating me for the Versatile Blogger Award. 🙂 It’s always nice to get a reminder that people are out there reading and enjoying my blog. Definitely check her blog out! It’s always an interesting read! 🙂

7 Random Facts About Me
1. A currently work as a government contractor in the accounting field, and I am a Certified Public Accountant (CPA) and Certified Fraud Examiner (CFE) – but I am seriously considering completely changing careers to work in nutrition. It’s hard to think about giving up something I worked so hard for, but I also think it’s important to have a job you love (or at least like sometimes).
2. One of my favorite songs is “American Pie” by Don McLean and my mom and I have sung it a capella (and in public places) several times over the years.
3. I was a long-time art student before I decided to give it up for a “real major” in Accounting. I still have several of my pieces of art hanging up around my house. My logic was that art was something I could always do on the side as a hobby, but other than some craft projects, I rarely do anything artistic anymore.
4. I currently have five tattoos – and plan on getting a few more. Each one has a very specific, personal meaning to me.
5. I’m thinking about signing up for a 10k in October, but part of me is convinced I’m too slow and I’ll be the last one to cross the finish line – so I haven’t signed up yet.
6. I absolutely love playing Scrabble. It is simultaneously one of the most satisfying and frustrating games on the planet.
7. I wish I had a theme song, and if I did it would be “Super Freak” by Rick James. That song is my jam.

Nominated Bloggers
Wellbeing Nut
My Year of Sweat
Once Upon a (L)ime

I hope you enjoyed learning a little bit more about me! Please check out the other bloggers as well 🙂